

HP: 1215 (Standard Game)
Souls Awarded: 3000 (Standard Game), 15000 (NG+,) 16051 (NG++)
 A large demon found in the
Undead Burg as you make your way to the
Undead Parish. It confronts you on a narrow strip of the battlements, high above the city. Later in the game, the Taurus Demon appears in other locations as a common enemy that respawns. This affords the player future opportunities to collect the Demon's Greataxe. Similar to the Bell Tower Gargoyles encountered later, the Taurus Demon does not immediately appear when the host passes through the fog gate. Rather, the host must travel approximately halfway across the battlements before the Taurus Demon appears atop the far tower and leaps down. Use this time before he appears to get ready by killing the tower archers as discussed below, and positioning any summons you have with you. Summoned allies will not trigger the Taurus Demon's appearance, so they can either run ahead to preposition near where he lands, or get atop the initial tower for falling attacks as discussed below.
A large demon found in the
Undead Burg as you make your way to the
Undead Parish. It confronts you on a narrow strip of the battlements, high above the city. Later in the game, the Taurus Demon appears in other locations as a common enemy that respawns. This affords the player future opportunities to collect the Demon's Greataxe. Similar to the Bell Tower Gargoyles encountered later, the Taurus Demon does not immediately appear when the host passes through the fog gate. Rather, the host must travel approximately halfway across the battlements before the Taurus Demon appears atop the far tower and leaps down. Use this time before he appears to get ready by killing the tower archers as discussed below, and positioning any summons you have with you. Summoned allies will not trigger the Taurus Demon's appearance, so they can either run ahead to preposition near where he lands, or get atop the initial tower for falling attacks as discussed below.
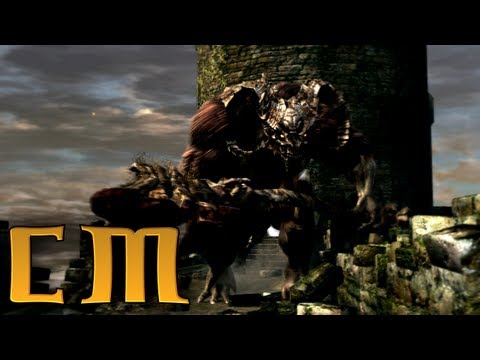
Video credit to Codemanster0
Attacks
Jumping Pound
If there's too much distance between you and the Taurus Demon, it will use the Jumping Pound to close in rapidly. The demon will crouch down, and then it will jump towards you and deliver a long range vertical attack. As soon as you see the demon crouch, either run towards it and roll past the attack, or continue moving backwards to get out of range.Standing Pound
This close range version of the Pound is only used if you're very close to the Demon, and is also much easier to avoid. Wait until you see the Demon raise its hammer into the air slowly, and as he commences the attack, walk around to his back. From this position you will be safe to attack before it recovers.Giant Swing
At the start of this attack the Demon will draw back its weapon briefly, before initiating a huge swing across a horizontal arc in front of it. This attack does not have very much range, so it can easily be evaded by backstepping once you see it draw its weapon back. Alternatively, you can roll towards the Demon and go under the attack, which will allow you to get some quick hits in.Quick Ground Stab
Another attack that the Demon will only use when you're close. Because it is one of the quickest attacks, it's the primary one you need to be wary of. The start of the attack is quite similar to the Standing Pound, but the follow up is much quicker. You can still move around to the back of the Demon during the start of the attack, but be ready to roll to the side in case you do not get around in time.Strategy
1. Take a right as soon as you enter and climb the ladder next to the stairs to eliminate the two archers on top.2. The easiest way to dispatch this boss is to, as soon as you see him jump down, run back to the tower where you eliminated the archers, climb up the ladder, and wait until he's just below you, then do a downward attack on him. Be careful as if you take too long, however, he will jump up and attack you. If you have summons with you, most will know to climb the tower and wait at the edge while you run forward to trigger the Taurus Demon. Give them time to get in position before you trigger the demon. Then simply run back and climb up the ladder while your summon(s) drop off the tower onto the pursuing Taurus Demon and deal heavy damage. With a strong weapon it is possible to kill him with a single falling attack. If you are a summon, wait while the demon chases the host back towards the ladder. Almost always, the demon will pause a short distance before the stairs, and then do a leap attack towards the base of the ladder. This will miss the host, but bring the demon right below you for a falling attack. If you drop off the tower before he charges, you may well miss so be patient.
3. If you prefer to fight him hand to hand, once you are on the bridge it is recomended to run through him and go further down the bridge, then turn around when he charges you. Keep your shield up and strafe around him. Despite his size it is fairly easy to get either around him or through his legs. If you have summons with you, try to position yourself on opposite sides of the Taurus Demon, as this will confuse him and cause him to waste time turning around repeatedly. The demon won't be able to attack you if you remain close to it with your shield up and remain alert to dodge his attacks. It is easy to remain behind him and attack him accordingly. The fight also becomes considerably easier if you fight him on top of the tower, which has more open space.
3. This boss also falls off battlements rather often, so if you want the drops, you should be careful to maneuver him to a safe position. He is most prone to doing so at the location around the center of the battlements where the stones have been damaged. Try to avoid fighting him there, as he seems almost scripted to back up and jump or throw himself off if he is nearby.
5. A good strategy for mage-type characters or anyone with a primarily projectile attack is this: after you eliminate the archers, go out on the bridge and get the boss to come after you. Run back and climb the ladder, then stand at the edge of the battlements, as close as you can get without falling off. It takes the boss five or six seconds to decide to jump up and join you, and that gives you enough time to fire one or two projectiles at him (CAUTION: you can fall off if you fire too enthusiastically, putting you right at his feet. If that happens, quickly climb the ladder again). Once he jumps up you can simply go down and start climbing the ladder again, he will come down after you allowing you to get back on top and get a few more projectiles off. Firebombs deal hefty damage to him as well.
Hints
- Finding the Gold Pine Resin in Undead Burg will make this fight trivial for melee characters. Each hit will do 200+ damage if enchanted by lightning, and the resins are devastatingly effective if combined with a falling attack off of the tower onto the Taurus Demon.
- This Boss is vulnerable to Fire Bombs. Buy 10-15 units from the Undead Merchant and your fight will be a lot easier.
- At low levels, do not try to attack the boss on the floor. Always climb to the top of the tower.
- The falling attack off the tower seems to count as a critical hit. The Hornet Ring does not boost this damage.
- This boss is actually optional. If you start with the master key gift you can skip him. Go through the door before the fog door leading to the boss past the knight at the bottom of the stairs Havel The Rock. You'll be able to open a door leading to the darkroot basin that leads to the darkroot garden. You can then walk to the bonfire next to Andre of Astoria the black smith and you'll be right at the Bell Gargoyles.Note: If you wish to farm Hellkite for souls, you cannot skip this boss, as the fog gate in the room leading from the bridge shortcut to the Undead Burg bonfire will be blocked. You can skip this boss and still farm the Hellkite. Walk toward the bonfire in the Undead Burg for the first time to "trigger" the Hellkite. Then take the shortcut mentioned above.Walk past to where the Greatsword Black Knight is and the three rats are, behind the spear Hollow. This will let you face the Hellkite without going through the fog.

Drops
- 3,000 souls
- 1 Humanity
- 1 Homeward Bone
- Demon's Greataxe as a possible drop.
Load more