


Black Dragon Kalameet
The Black Dragon Kalameet is one of the new bosses introduced in the Dark Souls: Prepare To Die Edition. He is one of the strongest dragons still alive, and is encountered by the player several times before he can finally be defeated.
"Even mighty Anor Londo dared not provoke his ire." - Hawkeye Gough
Kalameet appears for the first time while the player is traveling through the Royal Woods; he lands in a bridge and watches the player for a couple of seconds before flying away, similar to what the Red Wyvern does in Undead Burg. Kalameet can actually be targeted and hit while briefly perched on the bridge (such as by ranged weapons) but cannot be injured.
He is later encountered at the end of a valley going down from the Royal Forest. Going through the opposite way to where you fight Artorias the Abysswalker, you will find a very small stairway/path going down to the left of an elevator, with a body lying at the top of the trail. Follow the trail down as it curves around to the left and it will take you to the valley of the Royal Forest (the area underneath the small bridge with NPC Marvelous Chester standing at one end). There will be 2 dogs and a treasure to your left at the end of the valley, and turning to your right you will find 3 dogs and a very long ladder going down next to a waterfall, which leads to the place where you find Kalameet for the second time. If you are feeling adventurous, you can also descend the waterfall by falling down a series of rocks protruding from the water.
If you go to the giant valley where you find Kalameet before talking to Hawkeye Gough about him, he will approach you flying from the other side of the valley and fire his fire-breath to you. The fire-breath kills you instantly most of the time, though it's possible to survive one. It's impossible to fight him at this time. You first need to ask Hawkeye Gough's help to shoot Kalameet down so you can engage him in melee. If you venture deeper in the valley you find a message saying: "If only Hawkeye Gough were here..."
You will need to get attacked by Kalameet before Hawkeye Gough will offer to shoot down Kalameet. After you find Hawkeye Gough by unlocking his room using the Crest Key, you have to talk to him all the times you can until you exhaust his dialogues, then close the conversation. If you have not yet found and been set on fire by Kalameet near the waterfall at the end of the valley, you will not be able to ask for Gough's help (you do not need to get killed, but you do need to enounter him near the waterfall). Once you have found Kalameet the second time, go back to Gough and talk to him again; he will now ask you if you need help with the dragon. Say 'Yes.' He will ask if you intend to prevail until the end, say 'Yes.' Then a short cinematic will play showing Hawkeye Gough using his bow to take down Kalameet from the skies.
Now you have to go to the valley again and you will find Kalameet on the ground, though he will still use some low-altitude flying attacks. You can fight and kill him now. Keep in mind that a fog door will appear before his area now. The valley area, including Artorias's arena area, will also re-open for PvP once Kalameet has been shot down by Gough, as Kalameet is now considered a boss for the area. So a player in human form will now able to summon others to assist in fighting Kalameet, or be invaded by other players until Kalameet is killed.
Kalameet's black flame attacks deal both physical and magic damage, and it does not appear possible to completely eliminate the damage even with a good shield (although some buffs such as Great Magic Shield and Great Magic Barrier can nearly do so). But the damage can be minimized by the use of high magic resistance equipment and/or a high magic resistance shield, such as the Crest Shield. High stability greatshields can also be quite effective even if their magic damage reduction is not as high as the Crest Shield.
Attack Patterns:
- Jaw Snaps/Stabs, Kalameet darts his head to his sides while lurching forward, trying to crush you with its powerful jaws and spiked snout. He throws lashes his head 1-2 times. (to your right, then to your left). This is Kalameet's most used close ranged attack, and can be blocked with a shield if one has sufficient stamina.
- Breath of Fire, Kalameet breathes fire in straight line towards the player, if far away from it. Commonly one of its first attacks. (Avoidable by holding shield up and roll to the side once as soon as the first flame hits. Good moment to Flask up.)
- Leaping Sweep Attack, Kalameet lauches himself towards you at high speed to swing at you once with its frontal leg, from your left to your right. Blocking this is possible although it has good chances to deplete your whole stamina bar. May be followed by Jaw Snaps.
- Savage Stamping, Kalameet attempts to crush you with his rear legs, followed by a bite and a paw strike. This attack happens when you stand under its belly for too long.
- Tail Smash Kalameet attempts to crush you with his tail. This attack usually follows Savage Stamping if the player is behind Kalameet when Savage Stamping has finished. This attack can be repeated if the player is still directly behind Kalameet after he raises his tail back up. If the Tail Smash is dodged, this is an excellent time to cut off his tail, as he is slow to raise his tail back up. It is also good time to flask up.
- Agile Tail Flail ,Kalameet advances towards you, then swings his tail swiftly in a full rotation, jumping away from you in the same motion. May be repeated several times.
- Bull's Charge, Kalameet charges in your direction to stop in your back, tackling you at the same time. Not moving will get the player hit twice. Dodge it, as it will knock you off if you don't have enough poise, even when fully blocked. Very often followed by Rotating Breath of Fire.
- Rotating Breath of Fire, Kalameet breathes fire from your right to your left. Easily dodgeable, by running or rolling repeatedly to your left. Also possible to sustain minimal damage and consume less stamina by running right with holding shield up, getting hit one time only and leaving time to Flask up. Beware that Kalameet might follow up with a Leaping Sweep Attack.
- Scorching Inferno, Kalameet flies high in the sky and breathes fire straight under him, propagating fire in a large AoE circle. He may do so if you stay too long near him. As soon as you see him initiate this attack, run away then roll away twice as you hear Kalameet spouting his flames to avoid any damages without going too far. A little bit of practice makes it the perfect way to Flask up safely. You can also block this with a shield while backpedalling to take minimal damage. If you turn to run and are struck in the back, or have insufficient stamina to block, you will take more damage and may get completely knocked down.
- Diving Bull's Charge, Kalameet rises up in the sky and dives you. Dodged by strafing or rolling on the side when it is near ground level. If you are too far, Kalameet will turn around to face you. If you are close to its rear without being directly behind it, it'll swing it's tail from right to left without leaving you a chance to strike it's tail. However, if you stand close directly behind it's back, Kalameet will rather heavily smash its tail on the ground, leaving it long enough for one light 2-Handed strike. In the third situation, an horizontal tail swing might follow.
- Mark of Calamity, if standing directly in front of Kalameet for too long, Kalameet will rise on its hindlegs and uses telekinetic powers to make you levitate in front of its only eye. An orange cross will float over your head, indicating the debuff. As the name suggests, the debuff implies receiving twice the damage, just like Calamity Ring. Rolling back or to the sides avoids the ominous glare. This attack leaves time to the player to Flask up. It is also an excellent opportunity for other players not targeted by the initial gaze to run behind Kalameet to try to cut his tail off, as the tail will remain low to the ground for the duration of the attack.
- Slithering Flames, if standing too long directly in front of Kalameet, it will stands on its' hindlegs and starts breathing fire at you in a "S" pattern, moderately close to itself. It won't burn if you're right under him. This is another good opportunity to cut its tail off now by going to its back or hit its belly.
- Waterfall blast, if one or more players tries to stay above or climb back up to the top of the waterfall after the fight starts, Kalameet can fly up and blast them with fire, doing large amounts of damage.
N.B. : Every melee attack is likely to be followed by Jaw Snaps if the player stayed near.
Drops
- 60000 Souls
- Calamity Ring
- Obsidian Greatsword (if tail is severed)
General Notes and Tips
- Kalameet can be very aggressive and also chain or spam charges or AoE attacks, so it pays to be patient and look for opportunities rather than try to pummel him as quickly as possible. Blocking with a good shield while strafing tends to be more effective than trying to roll out of the way of his attacks, as many of them have large and unpredictable hit boxes that are hard to evade. Many of his attacks will, if successful, also knock you down in addition to dealing high damage, so a mistimed roll can result in extreme punishment or what amounts to a OHKO when he uses another AoE attack while you are trying to get back to your feet after being knocked down by the prior attack.
- Kalameet's black flame attacks deals mostly physical and magic damage, so high magic resist shields such as the Crest Shield or even the Dark Hand are better choices than fire resistant shields like the Black Knight or Dragon Crest shields. Armor that protects against magic damage is similarly more effective than high fire resist armor.
- Cutting off Kalameet's tail will automatically give the host player the Obsidian Greatsword, and also briefly knock Kalameet to the ground. Kalameet's tail can be difficult to sever, as he moves about fairly quickly, and does not often lower it to the ground. Weapons with vertical overhead swings such as various greatswords (including the obsidian greatsword), scythes, pole arms, and axes tend to be the most effective. As discussed above, his Tail Smash, Mark of Calamity, and Slithering Flames attacks are good opportunities to get behind him and attack his tail. It is also possible to cut his tail off with spells or ranged attacks, but this is usually a matter of blind luck. Thankfully, the tail has surprisingly low hp compared to Kalameet's overall life bar, and can be severed by as few as 4-5 hits with a sufficiently upgraded melee weapon.
- Player summons are particularly helpful in this boss battle, as one or more players can more easily get behind Kalameet to attack his tail if he is focused on someone else. Once Kalameet has been shot down into the valley arena by Gough, he is considered the "new" boss of the area even with Artorias dead, so players may once again be summoned in the area (and the host may once again be invaded while in human form). Although it is possible to find summon signs right outside Kalameet's fog gate on the valley floor, it is usually much easier to summon players near Artorias's arena up above the valley, and then lead them back down to Kalameet.
- It is strongly recommended that the player bring a full complement of 20 Estus flasks to the fight (ideally upgraded to +6/+7), as it can be a long and brutal battle. Summoned players should also try to bring their own forms of healing items and miracles, as even 20 upgraded Estus flasks is often not enough.
- Crossbows are very effective against Kalameet. Kalameet can be target locked with a ranged weapon from very far away, and a crossbow permits the user to also hold a shield in their off hand, enabling the player to block Kalameet's various charges and fire breath and then immediately shoot him with the crossbow during his recoveries. For example, a heavy crossbow +15 and heavy bolts safely deal on the order of 150 hp damage per shot even at long range, and heavy bolts may be purchased from nearby vendor Marvelous Chester.
- There is a crystal lizard that appears on one of the waterfall's rock platforms or falls to base of the waterfall to the left of the ladder. Players descending the ladder can usually sprint over and kill the lizard before Kalameet arrives in the area.
- A chest containing a Titanite Slab lies near one of the waterfalls. Defeating Kalameet is not necessary to loot it (you can pick it in the middle of the fight, but it's not recommended), although it may be troublesome to reach it if Hawkeye Gough hasn't shot him down.

Fight strategy
- Melee
- Obtain the Greatshield of Artorias; it's VERY helpful against this boss and necessary with this guide. (Blocking a hit with this shield consumes very little amount of stamina and it has still good protection from magic.)
- Try to be as close to dragon as you can, but not under him.
- Try to avoid his breathing attacks, if not, you must block them with your shield or he will kill you quickly that way.
- Using Green Blossoms helps a lot with stamina recovery for shield blocking.
- For first few minutes try to learn his attacks and know when you can attack him.
- Then block his attack, and perform your attack. Patience will be your best friend. It's block-attach-block technique, with the Greatshield of Artorias it's very effective way.
- If you want to obtain the Obsidian Greatsword perform your attacks only when he is facing away from you with his tail exposed near the ground. Be aware though, that he will attack you with his tail of you're behind him. The best moment to hit his tail is when he stands on his rear legs and performs a fire breathing attack and second when he lifts off ground and rush at you, when you block this attack he will be facing you with his tail, be aware that first let him attack with tail (vertical smash) and then try to hit it. You can also roll out of the way of his Mark of Calamity gaze attack and then sprint behind him for a few hits on his tail.
- Note: Greatshield of Artorias is very heavy and using Havel's Ring is recommended although not necessary if wearing that shield doesn't overload you, because defeating him with too much load is difficult especially when you're trying to cut off his tail, so try to be under 50% of your maximum load.
- If you don't have Greatshield of Artorias, I suggest Havel's Greatshield(found in a chest in Anor Londo, along with Havel's set and a Mimic) with Gold-Hemmed Black set (found in Demon Ruins, past the Ceaseless Discharge) and Mask of the Child, which speeds up stamina recovery without having to use Blossoms. As for the weapon, I confirmed I could beat Kalameet quite fast with Black Knight Sword or with any maxed out Greatsword/Axe with Medium speed or Fast speed.
2. Co-op Strategy Generally.
- There are a number of effective co-op strategies for first cutting off Kalameet's tail, and then killing him. All generally revolve around the idea of the host and two summons spreading out (typically into roughly a large triangle surrounding Kalameet) and patiently waiting for Kalameet to aggro on one player such that at least one of the others has time to run over and attack Kalameet's tail.
- Patience is key; players that immediately charge into Kalameet's head/feet and start flailing away with melee weapons are going to take a lot of damage, cause the host to waste a lot of precious Estus, and are very unlikely to cut off Kalameet's tail or even get Kalameet to perform an attack that makes his tail vulnerable for someone else. Instead, players should continue to circle Kalameet at roughly a middle distance, which enables them to escape or evade his charge attacks or fire breath, while remaining close enough to encourage him to try to use his Mark of Calamity gaze or tail attacks. Players familiar with his attack patterns should then immediately exploit these attacks on their allies and try to cut his tail off quickly.
- Once Kalameet's tail is cut off, players can be more aggressive and focus on pure damage output. The host should generally remain in reserve as a source of Estus healing and possibly ranged/spell attacks, while summons should start laying on the melee attacks. Staying to Kalameet's front-sides (e.g., his "two o'clock" and "ten o'clock") positions will enable melee attackers to strike his front legs while still being able to strafe or roll further to the sides and avoid most of his melee or fire attacks with little risk. With his tail gone it is also a bit safer to attack him from behind, although this is more likely to cause him to spin around to breathe fire, or to fly off and then return with more fire attacks. Pure DPS weapons/buffs are generally the best at this point in the fight, as unlike most bosses Kalameet cannot be staggered by high poise damaging weapons (aside from his scripted staggering when his tail is cut off). So a lighter, faster weapon with greater overall DPS is usually preferable to a powerful but more slower heavy weapon.
- Ranged spells and bows/crossbows can also be very effective when combined with melee attackers, and once Kalameet's tail is cut off it is common for a summon to "tank" him to hold his attention with a strong shield and melee attacks while one or more other players stand off and pepper him with ranged attacks or spells.
Specific Co-Op Greatbow strategy
- This strategy is confirmed for a fighting Kalameet with 2 summons and 1 summons, it does not work for a single player take down and is incredibly difficult, nigh impossible, to cut off his tail in this manner.
- One member will have to have the Dragon greatbow and gough arrows for this fight, with a strong secondary weapon which can be quickly changed to. Ideally this will be a summoned player as considering what you will do it will be hard to heal your summons if necessary.
- Whoever is going to do the shooting with the bow needs to position themselves one one of the 2 lower ledges where you find the crystal lizard once you are in the battle arena. You will have to drop down and take a small amount of damage but this should be no issue for most players.
- The other 2 players then need to trigger the sequence by going down the ladder.
- The bow player MUST not shoot first, wait until the 2 players in the arena engage Kalameet. This will stop him coming close to you.
- Once the 2 players are pestering Kalameet and have his attention you then can line up the shots and shoot away causing about 100dmg minimum with each shot.
- The other 2 player on the ground need to ensure to keep pestering Kalameet and hit him every now and then to keep his attention. This stops Kalameet aggroing on the bowman and means even when close he won't breathe fire on the shooter. The bow positions do not leave you out of range and it is possible for Kalameet to hit you but it is rare that he will attack you if you do this right.
- With this method it should take about 25 arrows to put Kalameet down and get rid of this highly annoying boss.
- As mentioned above the bowman will need a strong second weapon they can change to this is because if the 2 on the ground fail to engage quickly or get Kalameets attention he will come over to the bowman. If he does this simply change weapon and you get an amazing chance to do a plunging attack. Following this run, go back up the ladder while the others pester him and get back into position. This will allow you to keep doing damage even when he aggros on you. If you do not get your weapon out quick, make sure you are at least blocking and have high magic damage resistance or you will die. He will only hit you with fire in this position and you need not worry about the telekenisis attack or his melee attacks.
This co-op strategy is not confirmed if the shoot needs to be a summoned player or if it can be the host player. It has been tested each time with the summoned player doing the shooting. It maybe that if the host player does the shooting that Kalameet will agro against them whatever and you will not be able to complete it this way (Kalameet seems to track the host player more than anyone).
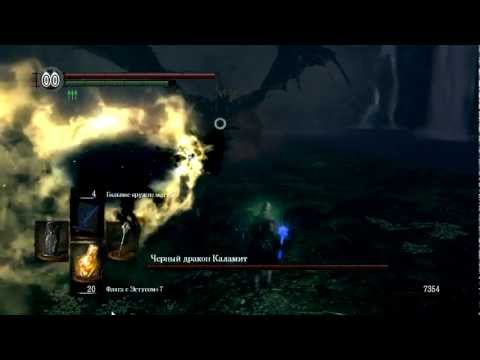
Video Boss Fight

Obtaining the Obsidian Greatsword
Kalameet is tough, and patience is required because he only rarely does the tail slam that leaves his tail open to attack. The best way is to get used blocking or avoiding his various attacks (it may take a few attempts) and, once you're confident you can handle dodging or blocking most of the time, begin working for his tail. One of his attacks is a diving charge where he'll flap upwards and then swoop at you and skid to a halt. Stay locked on to him, and dodge once when he's in the air--this should let you evade the attack--and then again to circle behind him so he'll do his tail slam--as soon as you see him hike his tail up, move to your right and it'll slam down on your left. Alternatively, you can just take the tail slam with a high stability shield, an Eagle Shield +14 was beyond sufficient. Break your lock and turn and attack his tail. You'll generally get one chance at a swing and then he'll lift his tail up and leap away or whirl around or so on. Repeat the process; it takes about a quarter of his life bar, maybe little less, to sever his tail. It helps to have 20 drinks of Estus to erase health loss from any mistakes you may make.
- Thanks to dachdachmailru on Youtube for the video.
Load more